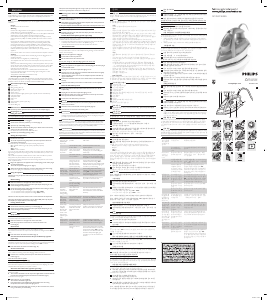
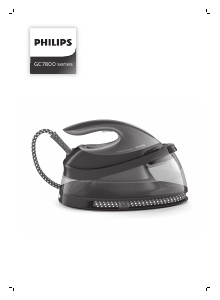
说明书 飞利浦 GC3569 熨斗
需要您的 飞利浦 GC3569 熨斗 手册吗? 您可以在下面免费查看和下载中文版 PDF 手册。 该产品目前有 5 个常见问题,0 条评论,有 0 票。 如果这不是您想要的手册,请联系我们。
您的产品是否出现故障而说明书没能提供解决方案?请前往 Repair Café 以获得免费维修服务。
说明书
Loading…

Introduction
Congratulations on your purchase and welcome to Philips! To fully benet from the
support that Philips offers, register your product at www.philips.com/welcome.
Important
Read this user manual carefully before you use the appliance and save it for future
reference.
Danger
- Never immerse the iron in water.
Warning
- Check if the voltage indicated on the appliance corresponds to the local mains
voltage before you connect the appliance.
- Do not use the appliance if the plug, the mains cord or the appliance itself shows
visible damage, or if the appliance has been dropped or leaks.
- If the mains cord is damaged, you must have it replaced by Philips, a service
centre authorised by Philips or similarly qualied persons in order to avoid a
hazard.
- Never leave the appliance unattended when it is connected to the mains.
- This appliance is not intended for use by persons (including children) with
reduced physical, sensory or mental capabilities, or lack of experience and
knowledge, unless they have been given supervision or instruction concerning
use of the appliance by a person responsible for their safety.
- Children should be supervised to ensure that they do not play with the
appliance.
- Do not let the mains cord come into contact with the hot soleplate of the iron.
Caution
- If the appliance is provided with an earthed plug, it must be plugged into an
earthed wall socket.
- Check the mains cord regularly for possible damage.
- The soleplate of the iron can become extremely hot and may cause burns if
touched.
- When you have nished ironing, when you clean the appliance, when you ll or
empty the water tank and also when you leave the iron even for a short while:
set the steam control to position 0, put the iron on its heel and remove the
mains plug from the wall socket.
- Always place and use the iron on a stable, level and horizontal surface.
- Do not put perfume, vinegar, starch, descaling agents, ironing aids or other
chemicals in the water tank.
- This appliance is intended for household use only.
Electromagnetic elds (EMF)
This Philips appliance complies with all standards regarding electromagnetic elds
(EMF). If handled properly and according to the instructions in this user manual, the
appliance is safe to use based on scientic evidence available today.
General description (Fig. 1)
A Spray nozzle
B Filling opening with cap
C Steam boost button ( 9)
D Spray button ( 8)
E Steam control
F Amber temperature light (specic types only: with red auto-off indication)
G Calc-Clean button
H Temperature dial
I Mains cord
J Heel
K Anti-Calc tablet (specic types only)
L Water tank
Not shown: lling cup
Before first use
1 Remove any sticker, protective foil or plastic from the soleplate (Fig. 2).
Preparing for use
Filling the water tank
Do not put perfume, vinegar, starch, descaling agents, ironing aids or other
chemicals in the water tank.
1 Make sure the appliance is unplugged.
2 Set the steam control to position 0 (= no steam) (Fig. 3).
3 Openthecapofthellingopening.
4 Tilttheironbackwardsandusethellingcuptollthewatertankwithtap
water up to the maximum level. (Fig. 4)
Do not ll the water tank beyond the MAX indication.
5 Closethecapofthellingopening(‘click’).
Setting the temperature
1 Put the iron on its heel.
2 To set the required ironing temperature, turn the temperature dial to the
appropriate position (Fig. 5).
Check the laundry care label for the required ironing temperature:
- 1 for synthetic fabrics (e.g. acrylic, nylon, polyamide, polyester)
- 1 for silk
- 2 for wool
- 3 for cotton and linen
If you do not know what kind or kinds of fabric an article is made of, determine the
right ironing temperature by ironing a part that is not visible when you wear or use
the article.
Silk, woollen and synthetic materials: iron the reverse side of the fabric to prevent
shiny patches. To prevent stains, do not use the spray function.
Start ironing the articles that require the lowest ironing temperature, such as those
made of synthetic bres.
3 Plug in the appliance. If the appliance has an earthed plug, put the mains plug in
an earthed wall socket.
, The amber temperature light goes on (Fig. 6).
4 When the temperature light goes out, wait a while before you start ironing.
The temperature light goes on from time to time during ironing.
Using the appliance
Note: The iron may give off some smoke when you use it for the rst time. This stops after
a short while.
Steam ironing
1 Make sure that there is enough water in the water tank.
2 Settherecommendedironingtemperature(seechapter‘Preparingforuse’,
section‘Settingthetemperature’).
3 Set the appropriate steam setting. Make sure that the steam setting is suitable
for the set ironing temperature: (Fig. 7)
- 1 - 2 for moderate steam (temperature settings 2 to 3)
- 3 - 4 for maximum steam (temperature settings 3 to MAX)
Note: The iron starts to produce steam as soon as it has reached the set temperature.
Note: If the selected ironing temperature is too low (MIN to 2), water may drip from
the soleplate (see chapter ‘Features’, section ‘Drip stop’).
Ironing without steam
1 Set the steam control to position 0 (= no steam) (Fig. 3).
2 Settherecommendedironingtemperature(seechapter‘Preparingforuse’,
section‘Settingthetemperature’).
Features
Spray function
You can use the spray function at any temperature to moisten the article to be
ironed. This helps remove stubborn creases.
1 Make sure that there is enough water in the water tank.
2 Press the spray button several times to moisten the article to be
ironed (Fig. 8).
Steam boost
A powerful steam boost helps to remove very stubborn creases.
The steam boost function can only be used at temperature settings between 2 and
MAX.
1 Press and release the steam boost button (Fig. 9).
Concentrated steam boost from the special Steam Tip (specic
types only)
The concentrated steam boost from the long vents in the Steam Tip enhances the
distribution of steam into every part of your garment. The concentrated steam boost
function can only be used at temperature settings between 2 and MAX.
1 Press and release the steam boost button (Fig. 10).
Vertical steam boost
You can also use the steam boost function when you hold the iron in vertical position.
This is useful for removing creases from hanging clothes, curtains etc.
1 Hold the iron in vertical position and press and release the steam boost
button (Fig. 11).
Never direct the steam at people.
Drip stop (specic types only)
This iron is equipped with a drip-stop function: the iron automatically stops producing
steam when the temperature is too low, to prevent water from dripping out of the
soleplate. When this happens you may hear a sound.
Automatic shut-off function (specic types only)
The automatic shut-off function automatically switches off the iron if it has not been
moved for a while.
, Theredauto-offindicationofthetemperaturelightashestoindicatethatthe
iron has been switched off by the automatic shut-off function (Fig. 6).
To let the iron heat up again:
1 Pick up the iron or move it slightly
, The red auto-off indication goes out.
, If the temperature of the soleplate has dropped below the set ironing
temperature, the amber temperature light goes on.
2 If the amber temperature light goes on after you have moved the iron, wait for
it to go out before you start ironing.
ENGLISH
u
www.philips.com
Note: If the amber temperature light does not go on after you move the iron, the soleplate
still has the right temperature and the iron is ready for use.
Cleaning and maintenance
Cleaning
1 Set the steam control to position 0, remove the plug from the wall socket and
let the iron cool down.
2 Wipeakesandanyotherdepositsoffthesoleplatewithadampclothanda
non-abrasive (liquid) cleaning agent.
To keep the soleplate smooth, avoid hard contact with metal objects. Never use a
scouring pad, vinegar or other chemicals to clean the soleplate.
3 Clean the upper part of the iron with a damp cloth.
4 Regularly rinse the water tank with water. Empty the water tank after you
have rinsed it (Fig. 12).
Double-Active Calc System (specic types only)
The Double-Active Calc System consists of an Anti-Calc tablet inside the water tank
combined with the Calc-Clean function.
1 The Anti-Calc tablet prevents scale from clogging the steam vents. This tablet is
constantly active and does not need to be replaced (Fig. 13).
2 The Calc-Clean function removes the scale particles from the iron.
Calc-Clean function
Use the Calc-Clean function once every two weeks. If the water in your area is very
hard (i.e. when akes come out of the soleplate during ironing), use the Calc-Clean
function more frequently.
1 Make sure the appliance is unplugged.
2 Set the steam control to position 0.
3 Fill the water tank to the maximum level.
Do not pour vinegar or other descaling agents in the water tank.
4 Set the temperature dial to MAX.
5 Plug in the appliance. If the appliance has an earthed plug, put the mains plug in
an earthed wall socket.
6 Unplug the iron when the temperature light goes out.
7 Hold the iron over the sink, press and hold the Calc-Clean button and gently
shake the iron to and fro (Fig. 14).
, Steamandboilingwatercomeoutofthesoleplate.Impuritiesandakes(if
any)areushedout.
8 Release the Calc-Clean button as soon as all the water in the tank has been
used up.
9 Repeat the Calc-Clean process if the iron still contains a lot of impurities.
After the Calc-Clean process
1 Put the plug back into the wall socket and let the iron heat up to let the
soleplate dry.
2 Unplug the iron when the temperature light goes out.
3 Move the iron gently over a piece of used cloth to remove any water stains
that may have formed on the soleplate.
4 Let the iron cool down before you store it.
Storage
1 Set the steam control to position 0, remove the plug from the wall socket and
let the iron cool down.
2 Wind the mains cord round the cord storage facility (Fig. 15).
3 Store the iron on its heel in a safe and dry place.
Environment
- Do not throw away the appliance with the normal household waste at the end
of its life, but hand it in at an ofcial collection point for recycling. By doing this,
you help to preserve the environment (Fig. 16).
Guarantee & service
If you need service or information or if you have a problem, please visit the Philips
website at www.philips.com or contact the Philips Consumer Care Centre in your
country (you nd its phone number in the worldwide guarantee leaet). If there is no
Consumer Care Centre in your country, go to your local Philips dealer.
Troubleshooting
This chapter summarises the most common problems you could encounter with the
appliance. If you are unable to solve the problem with the information below, contact
the Consumer Care Centre in your country.
Problem Possible cause Solution
The iron is
plugged in, but
the soleplate
stays cold.
There is a connection
problem.
Check the mains cord, the plug and the
wall socket.
The temperature dial
is set to MIN.
Set the temperature dial to the
required position
The iron does
not produce
any steam.
There is not enough
water in the water
tank.
Fill the water tank (see chapter
‘Preparing for use’, section ‘Filling the
water tank).
The steam control is
set to position 0.
Set the steam control to a position
between 1 and 4 (see chapter ‘Using
the appliance’, section ‘Steam ironing’).
The iron is not hot
enough and/or the
drip-stop function
has been activated
(specic types only).
Set an ironing temperature that is
suitable for steam ironing ( 2 to
MAX). Put the iron on its heel and wait
until the amber temperature light goes
out before you start ironing.
Water
droplets drip
onto the fabric
during ironing.
The temperature
dial has been set to
a temperature that
is too low for steam
ironing.
Set an ironing temperature that is
suitable for steam ironing (temperature
settings 2 to MAX). Put the iron
on its heel and wait until the amber
temperature light goes out.
You have put an
additive in the water
tank.
Rinse the water tank and do not put
any additive in the water tank.
You have not closed
the cap of the lling
opening properly.
Press the cap until you hear a click.
Flakes and
impurities
come out of
the soleplate
during ironing.
Hard water forms
akes inside the
soleplate.
Use the Calc-Clean function one or
more times (see chapter ‘Cleaning
and maintenance’, section ‘Calc-Clean
function’).
The
temperature
light ashes
red (specic
types only).
The automatic shut-off
function has switched
off the iron (see
chapter ‘Features’).
Move the iron slightly to deactivate the
automatic shut-off function. The red
auto-off indication of the temperature
light goes out.
Water drips
from the
soleplate
after the iron
has cooled
down or has
been stored
(specic types
only)
You have put the iron
in horizontal position
while there was still
water in the water
tank.
Always set the steam control to
position 0 and empty the water tank
after use. Store the iron on its heel.
The iron does
not produce a
steam boost.
You used the steam
boost function too
often within a short
period.
Continue ironing in horizontal
position and wait a while before you
use the steam boost function again..
The iron is not hot
enough.
Set an ironing temperature at which
the steam boost function can be used
(temperature settings 2 to MAX).
Put the iron on its heel and wait until
the amber temperature light goes
out before you use the steam boost
function.
4239.000.7114.2
GC3500 SERIES
한국어
제품 소개
필립스 제품을 구입해 주셔서 감사합니다! 필립스가 드리는 지원 혜택을 받
으실 수 있도록 www.philips.co.kr에서 회원을 등록하십시오.
중요사항
본 제품을 사용하기 전에 이 사용 설명서를 주의 깊게 읽고 나중에 참조할
수 있도록 잘 보관하십시오.
위험
- 다리미는 절대로 물에 담그지 마십시오.
경고
- 제품에 전원을 연결하기 전에, 제품에 표시된 전압과 사용 지역의 전압
이 일치하는지 확인하십시오.
- 플러그 및 전원 코드, 제품 본체에 눈에 띄는 손상이 있거나 혹은, 제품
을 떨어뜨렸거나 제품에서 물이 새면, 제품을 사용하지 마십시오.
- 전원 코드가 손상된 경우, 안전을 위해 필립스 서비스 센터 또는 필립스
서비스 지정점에 의뢰하여 교체하십시오.
- 제품이 전원에 연결된 상태에서는 자리를 절대 비우지 마십시오.
- 신체적인 감각 및 정신적인 능력이 떨어지거나 경험과 지식이 풍부하지
않은 사용자(어린이 포함)는 혼자 제품을 사용하지 말고 제품 사용과 관
련하여 안전에 책임 질 수 있도록 지시사항을 충분히 숙지한 사람의 도
움을 받으십시오.
- 어린이가 제품을 가지고 놀지 못하도록 지도해 주십시오.
- 열판이 가열되어 있을 때는 전원 코드가 열판에 닿지 않도록 주의하십
시오.
주의
- 제품 플러그가 접지형인 경우, 반드시 접지형 벽면 콘센트에 꽂으십시
오.
- 전원 코드에 손상 부위가 있는지 정기적으로 점검하십시오.
- 다리미의 열판은 매우 뜨거워질 수 있으므로 만질 경우 화상을 입을 수
도 있습니다.
- 다림질을 마쳤을 때, 다리미를 닦을 경우, 물탱크에 물을 보충할 경
우, 잠시라도 다리미를 놓아두고 자리를 비울 때는 스팀량 조절기를
‘0’으로 맞추십시오. 또한 다리미를 받침대에 세워 놓은 다음 벽면
콘센트에서 전원 플러그를 뽑으십시오.
- 다리미는 항상 안정적이고 평평하며 수평인 곳에 놓고 사용하십시오.
- 물 탱크에 향수, 식초, 풀, 석회질 제거제, 다림질 보조제, 기타 화학 약
품을 넣지 마십시오.
- 본 제품은 가정용입니다.
EMF(전자기장)
이 필립스 제품은 EMF(전자기장)와 관련된 모든 기준을 준수합니다. 이 사
용 설명서의 지침에 따라 적절하게 취급할 경우 이 제품은 안전하게 사용할
수 있으며 이는 현재까지의 과학적 증거에 근거하고 있습니다.
각 부의 명칭 (그림 1)
A 스프레이 노즐
B 뚜껑이 달린 물 주입구
C 순간 스팀 버튼(9)
D 스프레이 버튼(8)
E 스팀량 조절기
F 황색 온도 표시등(특정 모델만 해당: 적색 자동 전원 차단 표시등)
G 석회질 세척 버튼
H 온도 조절기
I 전원 코드
J 받침대
K 석회질 방지제(특정 모델만 해당)
L 물 탱크
그림 표시 안 됨: 물 주입용 컵
최초 사용 전
1 열판에붙어있는모든스티커나보호막또는플라스틱을제거하십시
오(그림2).
사용 전 준비
물 탱크 채우기
물탱크에향수,식초,풀,석회질제거제,다림질보조제,기타화학약품을
넣지마십시오.
1 전원플러그가분리되어있는지확인하십시오.
2스팀량조절기를‘0’(=스팀없음)에맞추십시오(그림3).
3물주입구뚜껑을여십시오.
4 다리미를뒤쪽으로기울이고물주입용컵을사용하여물탱크에수돗
물을최대수위까지채우십시오.(그림4)
물 탱크는 최대 수위량 표시 MAX 이상 채우지 마십시오.
5 물주입구뚜껑을여십시오(‘딸깍’소리가남).
온도 조절
1 다리미를바로세우십시오.
2온도조절기를적절한위치로돌려원하는온도를설정하십시오(그
림5).
다림질 온도는 의류에 부착된 세탁 표시 사항을 참고하십시오.
- 1 합성 섬유(예: 아크릴, 나일론, 폴리아미드, 폴리에스테르)
- 1 실크
- 2 모
- 3 면, 마
어떤 섬유로 만들어졌는지 잘 모르는 경우, 입거나 그 물건을 사용할 때 보
이지 않는 부분에 다림질을 해 보고 적절한 다림질 온도를 결정하십시오.
실크, 모직, 합성 섬유: 번들거림이 생기지 않도록 옷감의 뒤쪽을 다림질하
십시오. 얼룩이 생길 수 있으므로 스프레이 기능을 사용하지 마십시오.
합성 섬유 제품과 같이 가장 낮은 온도로 다림질해야 하는 것부터 다림질하
십시오.
3제품플러그를꽂으십시오.제품플러그가접지형인경우반드시접지
형벽면콘센트에꽂으십시오.
, 황색온도표시등이켜집니다(그림6).
4 온도표시등이꺼지면,잠시기다린후다림질을시작하십시오.
다림질하는 도중 온도 표시등이 수시로 켜집니다.
제품 사용
참고:다리미를처음사용할때에는연기가발생할수도있습니다.하지만
잠시후멈춥니다.
스팀 다림질
1 물탱크에물이충분한지확인하십시오.
2권장다림질온도를설정하십시오(‘사용준비’란의‘온도조절’참
조).
3적절한스팀설정을선택하십시오.이스팀설정이다림질온도에적합
한지확인하십시오(그림7).
- 1-2 단계: 보통 스팀(온도 조절: 2 ~ 3)
- 3-4 단계: 최대 스팀(온도 설정: 3 - MAX)
참고:다리미가설정된온도에도달하면스팀이분사되기시작합니다.
참고:다림질온도를너무낮게선택하면(MIN~2)열판에서물이샐수
있습니다(‘기능’란의‘누수방지’란참고).
일반 다림질(스팀 기능 차단)
1 스팀량조절기를‘0’(=스팀없음)에맞추십시오(그림3).
2권장다림질온도를설정하십시오(‘사용준비’란의‘온도조절’참
조).
기능
스프레이 기능
스프레이 기능을 사용하여 다림질할 부분을 적셔줄 수 있습니다. 이를 통해
심하게 구겨진 주름도 제거할 수 있습니다.
1 물탱크에물이충분한지확인하십시오.
2스프레이버튼을수차례눌러다림질할부분을적셔주십시오(그림8).
순간 스팀
강력한 순간 스팀은 잘 펴지지 않는 매우 심한 주름을 펴는 데 효과적입니
다.
순간 스팀 기능은 2에서 최대 온도 설정인 MAX 사이의 온도 설정에서만
사용할 수 있습니다.
1 순간스팀버튼을눌렀다가놓으십시오(그림9).
특수 스팀 팁에서 분사되는 집중 순간 스팀 팁(특정 모델만 해당)
스팀 팁의 긴 벤트에서 나오는 집중 순간 스팀은 옷감의 모든 부분에 스팀이
골고루 퍼지도록 합니다. 집중 순간 스팀 기능은 2 ~ MAX 사이의 온도 설
정에서만 사용할 수 있습니다.
1 순간스팀버튼을눌렀다가놓으십시오(그림10).
강력한 수직 스팀
순간 스팀 기능은 다리미를 수직으로 들고 있는 상태에서도 사용할 수 있습
니다. 이 기능은 걸려있는 옷이나 커튼 등의 주름을 없애는 데 유용합니다.
1 다리미를수직으로들고순간스팀버튼을놓습니다(그림11).
절대사람을향해스팀을분사하지마십시오.
누수 방지(특정 모델만 해당)
이 다리미에는 누수 방지 기능이 있습니다. 온도가 너무 낮은 경우 열판에서
물이 떨어지는 것을 방지하기 위해 다리미가 스팀 분사를 자동으로 중지합
니다. 이 때, 소리가 들립니다.
자동 전원 차단 기능(특정 모델만 해당)
다리미를 일정 시간 동안 움직이지 않으면 사용자의 안전을 위하여 자동 전
원 차단 기능이 자동으로 다리미의 전원을 꺼줍니다.
, 적색자동전원차단표시등이깜빡이며사용자의안전을위하여자동
전원차단기능에의해다리미의전원이꺼졌음을알려줍니다(그림6).
다리미를 다시 가열하려면
1 다리미를들거나가볍게움직이십시오.
, 적색자동전원차단표시등이꺼집니다.
, 열판의온도가설정한다림질온도아래로떨어지면황색온도표시등
이켜집니다.
2다리미를움직인이후에황색온도표시등이켜지면다림질을시작하기
전에표시등이꺼질때까지기다리십시오.
참고:다리미를움직여도황색온도표시등이켜지지않으면아직열판온
도가적절한온도를유지하고있으므로다림질을시작하실수있습니다.
청소 및 유지관리
청소
1 스팀량조절기를‘0’위치에맞춘다음벽면콘센트에서플러그를분
리하여다리미를식히십시오.
2젖은헝겊과비마모성세척액으로열판에서불순물을닦으십시오.
열판을매끈하게유지하기위해금속과같은딱딱한물체와접촉하지않도
록하십시오.열판을닦을때에는절대수세미나식초또는기타화학약품
을사용하지마십시오.
3물에적신천으로다리미상부를닦으십시오.
4 물탱크는물로정기적으로헹구십시오.세척후에는물탱크를비우십
시오(그림12).
이중 석회질 방지 시스템(특정 모델만 해당)
이중 석회질 방지 시스템은 물 탱크 내에 석회질 세척 기능과 석회질 방지제
로 구성되어 있습니다.
1 석회질 방지제는 석회질 및 물때가 스팀 분사구를 막는 것을 방지합니
다. 방지제는 영구적으로 사용 가능하므로 교체할 필요가 없습니다 (그
림 13).
2 석회질 방지제 기능은 다리미에서 석회질 입자를 제거합니다.
석회질 세척 기능
석회질 세척 기능은 2주일에 한 번씩 사용하십시오. 사용하는 지역에서 물
의 경도가 높을 경우(예를 들어, 다림질하는 동안 열판에서 이물질이 나오는
경우)에는 석회질 세척 기능을 더 자주 사용하십시오.
1 전원플러그가분리되어있는지확인하십시오.
2스팀조절기를‘0’으로설정하십시오.
3물탱크에물을최고수위(MAX)까지채우십시오.
물탱크에식초또는다른석회질제거제를넣지마십시오.
4 온도조절기를MAX로설정하십시오.
5 제품플러그를꽂으십시오.제품플러그가접지형인경우반드시접지
형벽면콘센트에꽂으십시오.
6온도표시등이꺼지면다리미전원플러그를뽑으십시오.
7다리미를싱크대위에서들고,석회질세척버튼을누른상태에서앞뒤
로천천히흔드십시오(그림14).
, 스팀과끓는물이열판의스팀구멍으로나오며,이때석회질과불순물
이함께나옵니다.
8물탱크의물이모두빠지면석회질세척버튼을놓으십시오.
9다리미에아직도불순물이많이남아있으면석회질세척작업을반복하
십시오.
석회질 세척 작업 후
1 전원플러그를벽면콘센트에꽂고다리미를가열하여열판을말리십시
오.
2온도표시등이꺼지면다리미전원플러그를뽑으십시오.
3다리미를못쓰는천위에문질러서열판에남아있는물얼룩을제거하
십시오.
4 보관하기전에다리미를식히십시오.
보관
1 스팀량조절기를‘0’위치에맞춘다음벽면콘센트에서플러그를분
리하여다리미를식히십시오.
2전원코드를코드보관함에잘감아놓으십시오(그림15).
3다리미는반드시안전하고건조한장소에똑바로세워서보관하십시오.
환경
- 수명이 다 된 제품은 일반 가정용 쓰레기와 함께 버리지 마시고 지정된
재활용 수거 장소에 버리십시오. 이런 방법으로 환경 보호에 동참하실
수 있습니다 (그림 16).
품질 보증 및 서비스
보다 자세한 정보가 필요하시거나, 사용상의 문제가 있을 경우에는 필립
스전자 홈페이지(www.philips.co.kr)를 방문하시거나 필립스 고객 상담실
로 문의하십시오. 전국 서비스센터 안내는 제품 보증서를 참조하십시오.
*(주)필립스전자: (02)709-1200 *고객 상담실: (080)600-6600(수신자
부담)
문제 해결
이 란은 제품을 사용하면서 가장 일반적으로 경험하게 되는 문제와 그 해결
방법을 제시합니다. 발생한 문제를 아래 정보로 해결할 수 없는 경우에는 필
립스 고객 상담실로 문의하십시오.
문제점 가능한 원인 해결책
다리미를 전
원에 연결했
지만 열판이
가열되지 않
습니다.
전원 연결에 문제
가 있습니다.
전원 코드, 전원 플러그 및 벽면 콘센
트를 확인하십시오.
온도 조절기가
MIN에 맞추었습
니다.
온도 조절기를 필요한 위치에 맞추
십시오.
다리미에서
스팀이 나
오지 않습
니다.
물 탱크의 물이 충
분하지 않습니다.
물탱크에 물을 채우십시오(‘제품
사용 전 준비’란의 ‘물 탱크 채우
기’란 참조).
스팀량 조절기를
0에 맞추었습니다.
스팀량 조절기를 1~4 사이에 맞추십
시오(‘제품 사용’란의 ‘스팀 다림
질’ 참조).
다리미가 충분히
가열되지 않거나
누수 방지 기능이
작동되었습니다(특
정 모델만 해당).
온도 조절기를 이용하여 스팀 다
림질에 적합한 다림질 온도(2 -
MAX)를 선택하십시오. 다리미를 똑
바로 세우고 황색 온도 표시등이 꺼
질 때까지 기다린 다음 다림질을 시
작하십시오.
다림질 하는
동안 옷 위로
물방울이 떨
어집니다.
온도 조절기의 온
도가 스팀 다림질
을 하기에 너무 낮
게 설정되어 있습
니다.
온도 조절기를 이용하여 스팀 다림
질에 적합한 다림질 온도(온도 설정
2 - MAX)를 선택하십시오. 다리미
를 똑바로 세우고 황색 온도 표시등
이 꺼질 때까지 기다리십시오.
물 탱크에 첨가제
를 넣었을 수 있습
니다.
물 탱크를 헹구고 더 이상 첨가제를
넣지 마십시오.
물 주입구의 뚜껑
을 제대로 닫지 않
았습니다.
딸깍 소리가 날 때까지 눌러 뚜껑을
닫아주십시오.
다림질을 할
때 열판에서
이물질이나
불순물이 떨
어집니다.
경수가 열판 내부
에 석회질을 생성
시켰습니다.
석회질 세척 기능을 여러 차례 사용
하십시오(‘청소 및 유지관리’란의
‘석회질 세척 기능’ 참조).
온도 표시등
이 적색으로
깜빡입니다
(특정 모델만
해당).
자동 전원 차단 기
능으로 다리미의
전원이 꺼진 상태
입니다(‘기능’
란 참조).
다리미를 약간 흔들어 자동 전원 차
단 기능을 해제하십시오. 온도 표시
등의 적색 자동 전원 차단 표시등이
꺼질 것입니다.
다리미를 식
히거나 보관
한 후에 열판
에서 물이 떨
어집니다(특
정 모델만 해
당).
물 탱크에 물이 아
직 남아 있는 상태
에서 다리미를 수
평으로 놓아 두었
습니다.
사용 후 항상 스팀량 조절기를 0에
맞추고 물 탱크를 비우십시오. 다리
미는 똑바로 세워서 보관하십시오.
다리미에서
순간 스팀이
나오지 않습
니다.
순간 스팀 기능을
짧은 시간 동안 너
무 자주 사용했을
수 있습니다.
순간 스팀 기능을 다시 사용하기 전
에 수평으로 다림질을 하면서 조금만
기다리십시오.
열판이 충분히 가
열되지 않습니다.
다림질 온도를 순간 스팀 기능을 사
용할 수 있는 온도(온도 설정 2 ~
MAX)로 설정하십시오. 다리미를 세
운 뒤 황색 온도 표시등이 꺼질 때까
지 기다린 다음 순간 스팀 기능을 사
용하십시오.
1
2 3 4 5
6
7 8 9
10 11 12 13
14 15 16
4239.000.7114.2.indd 1 06-08-10 10:03
Loading…
常见问题
请给产品评分,告知您对飞利浦 GC3569 熨斗看法。您是否希望分享对该产品的体验或提出问题?请在页面底部留言。有关本说明书的更多信息
我们知道,为您的 飞利浦 GC3569 熨斗 提供纸质手册是件好事。 您随时可以从我们的网站下载该手册并自行打印。 如果您想要原始手册,我们建议您联系Philips。 他们也许能够提供原始手册。 您是否正在寻找其他语言版本的 飞利浦 GC3569 熨斗 手册? 在我们的主页上选择您的首选语言并搜索型号以查看我们是否有可用。
规格
| 品牌 | Philips |
| 模型 | GC3569 |
| 类别 | 熨斗 |
| 文件类型 | |
| 文件大小 | 1.85 MB |
关于 飞利浦 GC3569 熨斗 的常见问题
我们的支持团队将搜索有用的产品信息并回答常见问题。如果您在常见问题中发现不准确的回答,请使用联系表格告知我们。


加入有关该产品的对话
您可以在这里分享您对 飞利浦 GC3569 熨斗 的看法。 如果您有疑问,请先仔细阅读手册。 可以使用我们的联系表索取手册。