说明书 飞利浦 RQ350 剃须刀
需要您的 飞利浦 RQ350 剃须刀 手册吗? 您可以在下面免费查看和下载中文版 PDF 手册。 该产品目前有 5 个常见问题,0 条评论,有 0 票。 如果这不是您想要的手册,请联系我们。
您的产品是否出现故障而说明书没能提供解决方案?请前往 Repair Café 以获得免费维修服务。
说明书
Loading…

- Water may drip from the socket at the bottom
of the shaver when you rinse it. This is normal
and not dangerous because all electronics
are enclosed in a sealed power unit inside
the shaver.
Electromagnetic elds (EMF)
- This Philips appliance complies with all
applicable standards and regulations regarding
exposure to electromagnetic elds.
General
- This shaver is waterproof. It is suitable for use
in the bath or shower and for cleaning under
the tap. For safety reasons, the shaver can
therefore only be used without cord (Fig. 2).
- The appliance is suitable for mains voltages
ranging from 100 to 240 volts.
- The adapter transforms 100-240 volts to
a safe low voltage of less than 24 volts.
- Maximum noise level: Lc = 69dB(A)
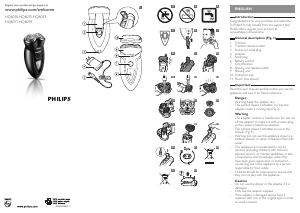
General description (Fig. 3)
1 Protection cap
2 Shaving unit with shaving head holder
3 Shaving head holder release buttons
4 On/off button
5 ’Battery low’ light
6 Retaining ring
7 Cutter
8 Shaving guard
9 Shaving head holder
10 Trimmer (RQ350 only)
11 Adapter
12 Charging light
13 Small plug
14 Cleaning brush
Charging
It takes approx. 10 hours to fully charge the battery.
A fully charged shaver provides up to 30 shaving
minutes.
If you have a heavy beard, the shaver may
provide less than 30 shaving minutes. The number
of shaving minutes may also vary over time,
depending on your shaving behaviour, cleaning
habits and beard type.
’Charging’ indication
- When the shaver is charging, the light on the
adapter lights up (Fig. 4).
’Battery low’ light
- When the battery is almost empty, the light on
the shaver lights up (Fig. 5).
Charging
Do not charge the shaver in the packaging.
1 Put the small plug in the shaver.
2 Put the adapter in the wall socket.
, The light on the adapter lights up to show
that the shaver is charging.
Note: The light on the adapter does not change colour
and does not go out when the shaver is fully charged.
Using the shaver
Note: You cannot use the shaver while it is connected
to the mains.
Shaving
Skin adaptation period
Your rst shaves may not bring you the result you
expect and your skin may even become slightly
irritated. This is normal. Your skin and beard need
time to adapt to any new shaving system.
We advise you to shave regularly (at least 3 times
a week) for a period of 3 weeks to allow your skin
to adapt to the new shaver. During this period, use
your new electric shaver exclusively and do not use
other shaving methods. If you use different shaving
methods, it is more difcult for your skin to adapt
to the new shaving system.
1
Press the on/off button to switch on the shaver.
2 Move the shaving heads over your skin.
Make both straight and circular movements
(Fig. 6).
3
Press the on/off button to switch off the shaver.
4 Clean the shaver after every shave
(see chapter ‘Cleaning and maintenance’).
Trimming (RQ350 only)
You can use the trimmer to groom your sideburns
and moustache.
1 Pull the shaving unit straight off the shaver
(Fig. 7).
Note: Do not twist the shaving unit while you pull it
off the shaver.
2 Insert the lug of the trimmer into the slot in
the top of the shaver (1). Then press down
the trimmer (2) to attach it to the shaver
(‘click’) (Fig. 8).
3 Press the on/off button to switch on the
trimmer. You can now start trimming.
4 Press the on/off button to switch off
the trimmer.
5 Pull the trimmer straight off the shaver
(Fig. 9).
Note: Do not twist the trimmer while you pull it off
the shaver.
6 Insert the lug of the shaving unit into the slot
in the top of the shaver (1). Then press down
the shaving unit (2) to attach it to the shaver
(‘click’) (Fig. 10).
Cleaning and maintenance
Detach the handheld part from the supply cord
before cleaning it in water.
Never use scouring pads, abrasive cleaning agents
or aggressive liquids such as petrol or acetone to
clean the shaver and its accessories.
- Clean the shaver after every shave.
- Clean the shaving heads frequently with Philips
Shaving Head Cleaning Spray (HQ110) for
optimal shaving performance.
- You can clean the outside of the shaver with
a damp cloth. Do not clean the shaving unit
with a cloth.
Cleaning the shaving unit
Be careful with hot water. Always check if the
water is not too hot, to prevent your hands from
getting burnt.
1 Switch off the shaver, remove adapter from
wall socket and pull the appliance/small plug
out of the shaver.
2 Rinse the shaving unit under a hot tap for
some time (Fig. 11).
Note: You can also clean the shaving unit with the
cleaning brush supplied.
3 After rinsing the appliance under the tap,
hold it upright for 10-15 seconds to allow
water to run out of the bottom.
4 Press the release buttons on the shaving unit
(1) and pull the shaving head holder off the
shaving unit (2). (Fig. 12)
5 Rinse the shaving head holder under a hot
tap for 30 seconds (Fig. 13).
Note: You can also clean the shaving head holder with
the cleaning brush supplied.
6 Carefully shake off excess water and let the
shaving head holder dry.
Never dry the shaving head holder with a towel
or tissue, as this may damage the shaving heads.
7 Reattach the shaving head holder to the
shaving unit (‘click’) (Fig. 14).
Extra-thorough cleaning method
1 Switch off the shaver.
2 Press the release buttons on the shaving unit
(1) and pull the shaving head holder off the
shaving unit (2) (Fig. 15).
3 To unlock the orange retaining ring, turn it in
the direction of the arrows indicated in and
on the retaining ring (Fig. 16).
4 Lift the retaining ring out of the shaving head
holder. (Fig. 17)
5 Remove the cutter and the shaving guard
(Fig. 18).
Note: Do not clean more than one cutter and shaving
guard at a time, since they are all matching sets.
If you accidentally put a cutter in the wrong shaving
guard, it may take several weeks before optimal
shaving performance is restored.
6 Clean the cutter with the cleaning brush
supplied (Fig. 19).
7 Clean the inside of the shaving guard (Fig. 20).
8 After cleaning, place the shaving guard back
into the shaving head holder. Make sure the
two wings t exactly into the recesses of the
shaving head holder (Fig. 21).
9
Place the cutter back into the shaving guard
with the cutter legs pointing downwards
(
Fig. 22).
10 Place the retaining ring back onto the shaving
head holder (1). To reattach the retaining ring,
turn it against the direction of the arrows
indicated in and on the retaining ring (2)
(Fig. 23).
Note: Make sure the retaining ring is xed properly.
The four wings of the retaining ring have to be
located exactly under the recesses of the shaving
head holder (Fig. 24).
11 Reattach the shaving head holder to the
shaving unit (‘click’). (Fig. 14)
Note: If the shaving unit does not close smoothly,
check if you have positioned the shaving heads
properly and if the retaining rings are xed properly.

Loading…
常见问题
请给产品评分,告知您对飞利浦 RQ350 剃须刀看法。您是否希望分享对该产品的体验或提出问题?请在页面底部留言。有关本说明书的更多信息
我们知道,为您的 飞利浦 RQ350 剃须刀 提供纸质手册是件好事。 您随时可以从我们的网站下载该手册并自行打印。 如果您想要原始手册,我们建议您联系Philips。 他们也许能够提供原始手册。 您是否正在寻找其他语言版本的 飞利浦 RQ350 剃须刀 手册? 在我们的主页上选择您的首选语言并搜索型号以查看我们是否有可用。
规格
| 品牌 | Philips |
| 模型 | RQ350 |
| 类别 | 剃须刀 |
| 文件类型 | |
| 文件大小 | 2.09 MB |
关于 飞利浦 RQ350 剃须刀 的常见问题
我们的支持团队将搜索有用的产品信息并回答常见问题。如果您在常见问题中发现不准确的回答,请使用联系表格告知我们。
振动剃须刀头和旋转剃须刀头有什么区别? 验证
这主要是个人需求和偏好的问题,但是通常可以说,振动剃须刀头中的刀片移动得更快,因此可以提供更快的效果。旋转的剃须刀头可以更轻松地到达面部的某些区域。
有帮助 (159) 阅读更多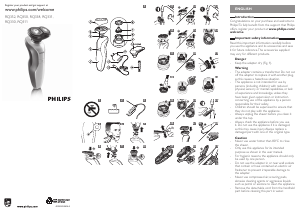


加入有关该产品的对话
您可以在这里分享您对 飞利浦 RQ350 剃须刀 的看法。 如果您有疑问,请先仔细阅读手册。 可以使用我们的联系表索取手册。