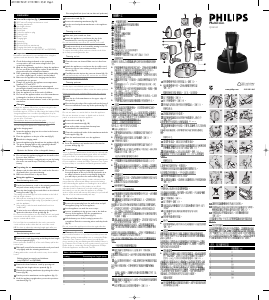
说明书 飞利浦QG3040胡须修理器
需要您的 飞利浦QG3040胡须修理器 手册吗? 您可以在下面免费查看和下载中文版 PDF 手册。 该产品目前有 1 个常见问题,0 条评论,有 0 票。 如果这不是您想要的手册,请联系我们。
您的产品是否出现故障而说明书没能提供解决方案?请前往 Repair Café 以获得免费维修服务。
说明书
Loading…

ENGLISH
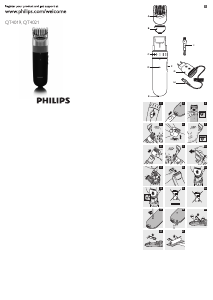
General description (fig. 1)
.
A 2D Contour Tracking beard trimmer comb
B Trimming attachment
C Hair length selector
D Release button
E On/off slide
F Socket for appliance plug
G Cleaning brush
H Barber's comb
I Charging light
J Powerplug
K Appliance plug
L Nose/ear/eyebrow attachment
M Charging stand with storage facility
N Precision attachment (only HQG 267 and QG 3040)
Important
.
Read these instructions for use carefully before using the
appliance and save them for future reference.
◗ Check if the voltage indicated on the powerplug
corresponds to the local mains voltage before you
connect the appliance.
◗ Only use the powerplug supplied to charge the appliance.
Do not cut off the powerplug to replace it with another
plug, as this will cause a hazardous situation.
◗ If the powerplug is damaged, always have it replaced by
one of the original type in order to avoid a hazard.
◗ Make sure the appliance, the charging stand and the
powerplug do not get wet.
◗ Charge, use and store the appliance at a temperature
between 15cC and 35cC.
◗ This appliance is only intended for trimming and
grooming the human beard, moustache, sideburns, nose
hair, ear hair and eyebrows.
◗ Keep the appliance out of the reach of children.
◗ Do not use the appliance when one of the attachments
is damaged or broken, as this may cause injury.
◗ Do not place the beard trimmer comb on the precision
attachment.
Charging
.
Charge the appliance fully before you start using it for the
first time or after a long period of disuse.
It will take approx. 10 hours to fully charge the battery. A fully
charged appliance has a cordless operating time of up to
35 minutes.When you charge the appliance for 3 hours, you
can use it for 15 minutes.
The appliance does not run from the mains.
Make sure the appliance is switched off during charging!
You can charge the appliance in 2 different ways:
1 In the charging stand:
◗ Insert the appliance plug into the socket in the bottom
of the stand (fig. 2).
◗ Place the appliance on the pin of the stand (fig. 3).
2 Outside the charging stand:
◗ Insert the appliance plug directly into the appliance (fig. 4).
◗ The green charging light on the powerplug indicates
that the appliance is charging (fig. 5).
Optimise the lifetime of the rechargeable battery
◗ Do not leave the appliance plugged into the wall socket
for more than 24 hours.
◗ Discharge the battery completely twice a year by letting
the motor run until it stops.Then fully recharge the
battery.
Preparing for use
.
◗ Always comb the hair with a fine comb in the direction
of growth before you start trimming.
◗ Make sure that the hair is dry and clean.
Using the appliance
.
Beard trimming with comb
1 Put the beard trimmer comb on the trimming attachment
and push it home until you hear a click (fig. 6).
2 Press the hair length selector and slide it to the desired
setting. See table I (fig. 7).
The setting selected will appear in the window to the left of
the hair length selector.
B
When you are trimming for the first time, start at the
maximum trimming length setting (9) to familiarise yourself
with the appliance.
B
Using setting 1 with the comb installed will result in a
'stubble look'.
3 To trim in the most effective way, move the appliance
against the direction of hair growth (fig. 8).
Do not move the appliance too fast. Make smooth and gentle
movements and make sure the surface of the comb always
stays in contact with the skin.
If a lot of hair has accumulated in the comb, remove the
comb and blow and/or shake the hair out of the comb.
NB:You have to adjust the trimming length again after you
have removed the comb!
Beard trimming without comb
1 Remove the comb by pressing and sliding the hair length
selector upwards (fig. 9).
Never pull at the flexible top of the comb. Always pull at the
bottom part.
2 Make well-controlled movements and touch your beard
only slightly with the trimming attachment.
Cutting without the comb will result in a very short stubble
beard.
Defining beard, moustache and sideburns
(only HQG 267 and QG 3040)
1 Remove the beard trimmer comb by pressing and
sliding the hair length selector upwards (fig. 9).
2 Detach the trimming attachment by pushing the release
button (fig. 10).
3 Put the precision attachment on the appliance (fig. 11).
◗ Hold the appliance upright when you use the precision
attachment (fig. 12).
Grooming facial hair (nose hair, ear hair and eyebrows)
1 Remove the comb (fig. 9).
2 Remove the trimming attachment (fig. 10).
3 Put the nose/ear/eyebrow attachment on the appliance
(fig. 13).
Trimming nose hair
1 Make sure your nostrils are clean.
2 Switch the appliance on and insert the tip of the
attachment into one of your nostrils (fig. 14).
Do not insert the tip more than 0.5 cm into your nostril.
3 Slowly move the tip in and out while turning it round at
the same time to remove unwanted hair.
To reduce the tickling effect, make sure that the side of the
tip is firmly pressed against the skin.
Trimming ear hair
1 Clean the outer ear channel. Make sure it is free from
wax.
2 Switch the appliance on and move the tip softly round
the ear to remove hairs sticking out beyond the rim of
the ear (fig. 15).
3 Carefully insert the tip into the outer ear channel (fig. 16).
Do not insert the tip more than 0.5 cm into the ear channel
as this could damage the eardrum.
Trimming eyebrows
Use the tip to cut individual eyebrow hairs.
Do not use the appliance to define or trim the entire eyebrow.
Never try to trim your eyelashes.Never come too close to
your eyes!
1 Place the tip of the attachment on the upper edge of
the eyebrow.
2 Move it along the edge of the eyebrow from the base of
the nose towards the outer tip of the eyebrow (fig. 17).
Cleaning
.
Do not use water or a moist cloth to clean this appliance.
Do not use abrasives, scourers or liquids such as alcohol,
petrol or acetone to clean the appliance.
1 Remove the comb (fig. 9).
2 Remove the attachment (fig. 10).
3 Blow and/or shake out any hair that may have
accumulated in the attachment.
4 Clean the outside and inside of the attachment with the
brush supplied (fig. 18).
5 Place the attachment back onto the appliance.
Storage
.
◗ Store the appliance and attachments in the stand to
prevent damage (fig. 19).
Replacement
.
Worn or damaged attachments should only be replaced with
original Philips replacement attachments, which are available
from your dealer or an authorised Philips service centre.
If you have any difficulties obtaining replacement attachments
for your appliance, contact the Philips Customer Care Centre
in your country or consult the worldwide guarantee leaflet.
Environment
.
◗ Do not throw the appliance away with the normal
household waste at the end of its life, but hand it in at
an official collection point for recycling. By doing this
you will help to preserve the environment (fig. 20).
The built-in rechargeable battery contains substances that
may pollute the environment.Always remove the battery
before discarding the appliance or handing it in at an official
collection point. Dispose of the battery at an official
collection point for batteries. If you have trouble removing
the battery, you can also take the appliance to a Philips
service centre, which will remove the battery for you and will
dispose of it in an environmentally safe way.
Disposal of the battery
1 Remove the powerplug from the wall socket and pull
the appliance plug out of the appliance.
2 Let the appliance run until the motor stops.
3 Insert a screwdriver in the groove next to the shaft at
the top of the appliance.Turn the screwdriver to
separate the two housing halves (fig. 21).
4 Lift the battery out of the housing by means of a
screwdriver.Twist the connecting wires until they break
(fig. 22).
Do not connect the appliance to the mains again after the
battery has been removed.
Guarantee & service
.
If you need information or if you have a problem, please visit
the Philips website at www.philips.com or contact the Philips
Customer Care Centre in your country (you will find its
phone number in the worldwide guarantee leaflet). If there is
no Customer Care Centre in your country, turn to your local
Philips dealer or contact the Service Department of Philips
Domestic Appliances and Personal Care BV.
A
B
C
D
E
F
G
H
I
J
K
L
M
N
◗
◗
◗
◗
◗ c c
◗
◗
◗
◗
1
◗
◗
2
◗
◗
◗
◗
◗
◗
1
2
B
B
3
1
2
1
2
4203 000 54845
www.philips.com
A
B
D
E
G
H
J
K
L
M
N
C
I
F
Multitrim
QG3040
Remaining hair length (mm)
2
4
6
8
10
12
14
16
18
Setting
1
2
3
4
5
6
7
8
9
Table 1. Beard trimmer
3
◗
1
2
3
1
2
0.5 cm
3
1
2
3
1
2
1
2
3
4
5
◗
◗
1
2
3
4
u
2 3 4
5 6 7
8 9 10
11 12 13
MAX
5
m
m
14 15
MAX
5
m
m
16
17 18 19
20 21 22

Loading…
常见问题
请给产品评分,告知您对飞利浦QG3040胡须修理器看法。您是否希望分享对该产品的体验或提出问题?请在页面底部留言。有关本说明书的更多信息
我们知道,为您的 飞利浦QG3040胡须修理器 提供纸质手册是件好事。 您随时可以从我们的网站下载该手册并自行打印。 如果您想要原始手册,我们建议您联系Philips。 他们也许能够提供原始手册。 您是否正在寻找其他语言版本的 飞利浦QG3040胡须修理器 手册? 在我们的主页上选择您的首选语言并搜索型号以查看我们是否有可用。
规格
| 品牌 | Philips |
| 模型 | QG3040 |
| 类别 | 胡须修理器 |
| 文件类型 | |
| 文件大小 | 1.75 MB |
关于 飞利浦QG3040胡须修理器 的常见问题
我们的支持团队将搜索有用的产品信息并回答常见问题。如果您在常见问题中发现不准确的回答,请使用联系表格告知我们。

加入有关该产品的对话
您可以在这里分享您对 飞利浦QG3040胡须修理器 的看法。 如果您有疑问,请先仔细阅读手册。 可以使用我们的联系表索取手册。