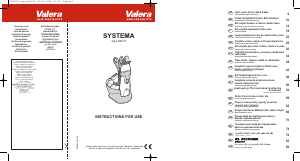
说明书 ValeraSystema理发推子
需要您的 ValeraSystema理发推子 手册吗? 您可以在下面免费查看和下载中文版 PDF 手册。 该产品目前有 2 个常见问题,0 条评论,有 0 票。 如果这不是您想要的手册,请联系我们。
您的产品是否出现故障而说明书没能提供解决方案?请前往 Repair Café 以获得免费维修服务。
说明书
Loading…

8
RECHARGING THE BATTERY
• Before using the appliance for the first time, charge the battery for 24 hours. For subsequent charges, allow
the appliance to charge for at least 12 hours.
• Switch the appliance off using the switch (fig.1 - ref.3). The battery can only be charged with the appliance
switched off.
• Connect the transformer (fig.1 - ref.9) by inserting the plug into the appliance socket (fig.1 - ref.5). Or
connect the transformer to the base (fig.1 - ref.6) by inserting the plug into the base plug (fig.1 - ref.5), and
rest the appliance on the contact (fig. 1 - ref.7).
• Plug the transformer into the mains.
• The charge light (fig.1 - ref. 4) turns red while the appliance is charging and reverts to green when charging
is complete.
• When the battery is fully charged, the appliance can be used for approximately 50 minutes without connection
to the mains.
• In order to optimise the lifetime of the battery, never charge the appliance for more than 24 hours.
• Discharge the battery completely every few months, then recharge it again. This optimises the lifetime of the
battery.
ADJUSTABLE GUIDE COMBS
The appliance is supplied with two hair/beard and moustache trimming combs, which can be adjusted to offer
different cutting lengths: from 2 to 8 mm and from 10 to 16 mm.
To adjust the guide comb, press the adjustment button (fig.1 ref.16) and slide the comb in or out until it reaches
the desired cutting length, as illustrated in fig. 2.
The various positions can be seen on the comb setting indicator (fig.1 ref.17).
The comb attachment can be removed by lifting the tab at the rear (fig.3); in this case the cutting length is 1
mm.
To refit the comb attachment, slot the front in first (fig.4 - A), then press down on the rear (B).
The appliance is also supplied with an adjustable comb for body hair, with three different cutting lengths: 2, 5
or 9 mm. For cutting length adjustment guidelines, see fig.5.
FITTING AND REMOVING THE HEAD
Please refer to fig.6 when removing the head. For instructions on re-fitting the appliance head, see fig.7.
USING THE HEADS
The appliance is supplied with 5 heads.
• Hair cutting head (fig.1 ref.2) - For trimming hair, can either be used alone or in conjunction with the relevant
combs (fig.1 ref.15).
• Body hair head (fig.1 ref.10) - For trimming body hair, can either be used alone or in conjunction with the
relevant comb (fig.1 ref.14).
• Nose and ear hair head (fig.1 ref.11) - For removing unwanted hair from these areas.
• Beard and moustache head (fig.1 ref.12) - For tidying beards, can either be used on its own or in conjunction
with the relevant combs (fig.1 ref.15).
• Shaver head (fig.1 ref.13) - With fine stainless steel foil for supreme hygiene and narrow design for easier
shaving.
STYLING TIPS
SHORT STYLES
• We recommend starting with the longest cutting length and subsequently adjusting to a shorter length, if
desired.
• Cut hair while dry, using short strokes and progressing slowly.
• Comb the hair as you proceed in order to remove cut hair and check the results.
• NECK: Starting from the midpoint of the bottom of the neck work upwards using short strokes towards the
middle of the head (fig. 8), gradually working outwards to the sides.
• SIDES: We recommend using a shorter cutting length, using the same method as for the neck area.
To finish sideburns and the area around the ears, use the appliance without a guide comb, holding it turned
downwards.
• TOP: Use a longer cutting length. Start at the front and move backwards, towards the centre of the head.
LONGER STYLES
• Use the same method, starting from the neck and working upwards, followed by the sides and then the top
of the head.
• To adjust the cutting length, use the barber's comb (fig.9), or else your fingers to help (fig.10), using the
appliance without a guide comb.
BEARD AND MOUSTACHE TRIMMING
• Decide on the kind of look you want to obtain, based on your face and the length of beard and moustache.
• When trimming beard and moustache, start off with the comb attachment adjusted to a high setting, and then
move onto a shorter setting if so desired. A weekly trim will suffice to maintain the look.
• Define edges using the beard and moustache head (fig.1 ref.12), then use the shaver head (fig.1 ref.13) to
finish.
• For best results, beard and moustache can be dampened (not wet), and brushed in the direction of growth.
• Proceed to trim, working upwards from the bottom, beginning at the jaw and moving towards the ears.
00060589 int_nov2014 26/11/2014 12.52 Pagina 8

Loading…
常见问题
请给产品评分,告知您对ValeraSystema理发推子看法。您是否希望分享对该产品的体验或提出问题?请在页面底部留言。有关本说明书的更多信息
我们知道,为您的 ValeraSystema理发推子 提供纸质手册是件好事。 您随时可以从我们的网站下载该手册并自行打印。 如果您想要原始手册,我们建议您联系Valera。 他们也许能够提供原始手册。 您是否正在寻找其他语言版本的 ValeraSystema理发推子 手册? 在我们的主页上选择您的首选语言并搜索型号以查看我们是否有可用。
规格
| 品牌 | Valera |
| 模型 | Systema |
| 类别 | 理发推子 |
| 文件类型 | |
| 文件大小 | 2.87 MB |
Valera理发推子 的所有手册
理发推子 的更多手册
关于 ValeraSystema理发推子 的常见问题
我们的支持团队将搜索有用的产品信息并回答常见问题。如果您在常见问题中发现不准确的回答,请使用联系表格告知我们。


加入有关该产品的对话
您可以在这里分享您对 ValeraSystema理发推子 的看法。 如果您有疑问,请先仔细阅读手册。 可以使用我们的联系表索取手册。