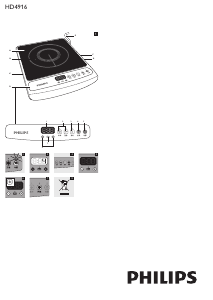
说明书 飞利浦 HD4921 炉灶
需要您的 飞利浦 HD4921 炉灶 手册吗? 您可以在下面免费查看和下载中文版 PDF 手册。 该产品目前有 3 个常见问题,0 条评论,有 0 票。 如果这不是您想要的手册,请联系我们。
您的产品是否出现故障而说明书没能提供解决方案?请前往 Repair Café 以获得免费维修服务。
说明书
Loading…

EN User manual
MS-MY Manual pengguna
VI Hướng dẫn sử dụng
ZH-HK 使用手冊
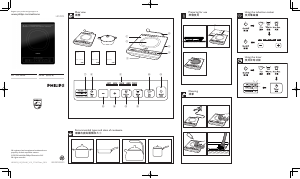
Overview Tổng quan
Gambaran keseluruhan
概覽
Preparing for use Chun b sử dụng my
Bersedia untuk menggunakan
準備使用
Using the induction cooker Menggunakan periuk aruhan
Sử dụng bếp từ
使用電磁爐
Using the timer Sử dụng chức năng hẹn giờ
Menggunakan pemasa
使用定時功能
Cleaning V sinh my
Pembersihan
清潔
Recommended types and sizes of cookware Cc loại và kích cỡ dụng cụ nấu khuyên dùng
Jenis dan saiz alat memasak yang disarankan
建議的廚具種類和大小
All registered and unregistered trademarks are
property of their respective owners.
© 2012 Koninklijke Philips Electronics N.V.
All rights reserved.
HD4921_ASEAN_UM_V1.0
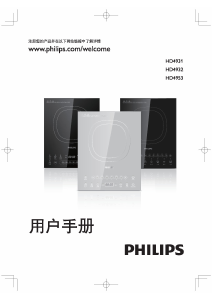
HD4921
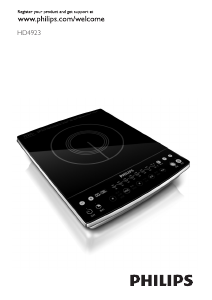
Register your product and get support at
www.philips.com/welcome
English
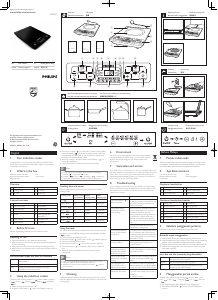
1 Your induction cooker
Congratulations on your purchase and welcome to Philips! To fully
benet from the support that Philips offers, register your product at
www.philips.com/welcome.
2 What’s in the box
Induction cooker main unit Pot
Important information leaet User manual
Warranty card
Overview
a
Cooking plate
d
Control panel
b
Cooking zone
e
Air outlets
c
Air inlet
f
Power cord
Controls overview
g
Menu button
n
Water indicator
h
Hot pot indicator
o
Timer button
i
Steam indicator
p
On/Off button
j
Braise indicator
q
Increase button
k
Screen
r
Cooking power and
temperature
l
Soup indicator
s
Decrease button
m
Roast indicator
t
Fry button
3 Before first use
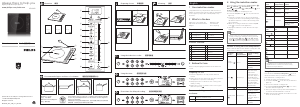
Remove all packaging materials from the induction cooker.
Preparing for use
1 Place the appliance on a dry, stable and level surface.
2 Make sure there is at least 10cm free space around the appliance to
prevent overheating.
3 Always place the cookware on the cooking zone during cooking.
4 Make sure you use cookware of the correct types and sizes (see the
table below).
Recommended types and sizes of cookware
Material Cookware with a bottom made of iron or magnetic
stainless steel
Shape Cookware with a at bottom
Size Cookware with a bottom diameter of 10-23cm,
depending on the cooking mode
4 Using the induction cooker
There are seven cooking modes: Fry ( ), Braise (
Braise
), Hot pot
( ), Soup ( ), Roast ( ), Water ( ) and Steam
( ).
1 Follow the steps in “Preparing for use”.
2 Press the On/Off button ( ), the On/Off indicator lights up.
3 Press the Fry button ( ) to cook with fry mode. Press the Menu
button repeatedly ( ) to choose the other cooking modes. The
corresponding indicator lights up and the induction cooker starts
working in the selected cooking mode.
4 When the cooking is nished, press the On/Off button ( ) to
switch off the appliance.
5 Unplug the induction cooker after the fan stops working.
Note
• During cooking, you can change the power level by pressing the
Increase ( ) or Decrease ( ) button.
• In Water ( ), Soup ( ) and Steam ( ) modes, the
cooking power automatically changes for better cooking result.
Cooking time and power
Refer to below table for the cooking time and power of different
cooking modes.
Cooking mode Default cooking
time (minutes)
Default
cooking power
Power
adjusting range
Fry ( )
120 1000W 100-1000W
Braise (
Braise
)
120 1000W 100-1000W
Hot pot ( )
120 1800W 100-2000W
Soup ( )
180 1000W 100-2000W
Roast ( )
120 1000W 100-1000W
Water ( )
20 1800W 100-2000W
Steam ( )
60 1800W 100-2000W
Using the timer
You can use the Timer button to decide how much time you want the
appliance to work at different cooking modes (not applicable in Water
( ) mode).
1 Follow the steps in “Preparing for use”.
2 Press the On/Off ( ) button, the On/Off ( ) indicator lights up.
3 Choose the desired cooking mode.
4 Press the Timer button ( ) and the timer indicator lights up.
5 Press the Increase ( ) or Decrease ( ) button to adjust the
time.
6 When the time has elapsed, the induction cooker turns off
automatically.
Note
• After you have selected the cooking time, wait for a few seconds
before the induction cooker automatically conrms it.
• After the time is set, you can press the Timer button ( ) again to
cancel the timer.
5 Cleaning
Unplug the appliance after the fan stops working and let it cool down.
Clean the appliance with a damp cloth and, if necessary, with some mild
cleaning agent.
6 Environment
Do not throw away the appliance with the normal household
waste at the end of its life, but hand it in at an ofcial collection
point for recycling. By doing this, you help to preserve the
environment.
7 Guarantee and service
If you need service or information or if you have a problem, please visit
the Philips website at www.philips.com or contact the Philips Consumer
Care Centre in your country (you will nd its phone number in the
worldwide guarantee leaet). If there is no Consumer Care Centre in
your country, go to your local Philips dealer.
8 Troubleshooting
If your induction cooker does not function properly or if the cooking
quality is insufcient, consult the table below. If you are unable to solve
the problem, contact a Philips service centre or the Consumer Care
Centre in your country.
Problem Solution
The On/Off button ( )
does not respond.
There is a connection problem. Check if
the induction cooker is connected to the
mains and if the plug is inserted rmly
into the wall socket
The appliance beeps
continuously and then
stops working.
You may have put unsuitable cookware
on the cooking plate or you may have
removed the cookware from the
cooking plate during cooking. Make sure
the cookware is made of steel, iron or
aluminum with stainless steel cladding
base and has a base diameter larger than
10cm.
You may have placed the cookware
outside of the cooking zone.
The cookware does not
heat up to the required
temperature.
The bottom of the cookware may not be
at. Use cookware with a at bottom. If
the problem still exists, take the appliance
to your Philips dealer or a service center
authorised by Philips.
The appliance stops
working suddenly.
The temperature of the cookware might
be too high. Let the cookware cool
down for a while.
When I press one of the
cooking mode buttons,
the light of the selected
mode does not go on.
The light is defective. Take the appliance
to your Philips dealer or a service centre
authorised by Philips.
The fan works but the
appliance has not started
working.
You have to select a cooking mode after
you have pressed the ON/OFF ( )
button.
Error code E0, E1, E2,
E3, E4, E7, E8 or E9 is
displayed on the screen.
The induction cooker has malfunction.
Take the appliance to your Philips dealer
or a service center authorised by Philips.
Error code E5 or E6 is
displayed on the screen.
The voltage is either too high or too
low. Check if the voltage in your home is
suitable for
the induction cooker.
Bahasa Melayu
1 Periuk aruhan anda
Tahniah atas pembelian anda dan selamat menggunakan Philips! Untuk
mendapatkan manfaat sepenuhnya daripada sokongan yang ditawarkan
oleh Philips, daftar produk anda di www.philips.com/welcome.
2 Apa dalam kotak ini
Unit utama periuk aruhan Periuk
Risalah maklumat penting Manual pengguna
Kad waranti
Gambaran keseluruhan
a
Plat memasak
d
Panel kawalan
b
Zon masak
e
Saluran keluar udara
c
Salur masuk udara
f
Kord kuasa
Gambaran keseluruhan kawalan
g
Butang menu
n
Penunjuk Air
h
Penunjuk Hot Pot
o
Butang pemasa
i
Penunjuk Stim
p
Butang Hidup/Mati
j
Penunjuk Tumis
q
Butang Tingkatkan
k
Skrin
r
Kuasa dan suhu memasak
l
Penunjuk Sup
s
Butang Kurangkan
m
Penunjuk Panggang
t
Butang Goreng
3 Sebelum penggunaan pertama
Keluarkan semua bahan pembungkusan dari periuk aruhan.
Bersedia untuk menggunakan
1 Letak perkakas di atas permukaan yang kering, stabil dan rata.
2 Pastikan terdapat sekurang-kurangnya 10cm ruang kosong di sekeliling
perkakas untuk mengelakkan daripada pemanasan melampau.
3 Sentiasa letakkan alat memasak pada zon memasak apabila memasak.
4 Pastikan anda menggunakan jenis dan saiz alat memasak yang betul
(lihat jadual di bawah).
Jenis dan saiz alat memasak yang disarankan
Bahan Alat memasak dengan dasar yang dibuat daripada besi
atau keluli tahan karat magnetik
Bentuk Alat memasak dengan dasar yang leper
Saiz Alat memasak dengan garis pusat bawah 10-23cm,
bergantung pada mod memasak.
4 Menggunakan periuk aruhan
Terdapat tujuh mod memasak: Goreng ( ), Tumis (
Braise
), Hot
pot ( ), Sup ( ), Panggang ( ), Air ( ) dan Stim
( ).
1 Ikuti langkah-langkah dalam “Bersedia untuk menggunakan”.
2 Tekan butang Hidup/Mati ( ), lampu penunjuk Hidup/Mati
bernyala.
10cm
10cm
www.philips.com/welcome
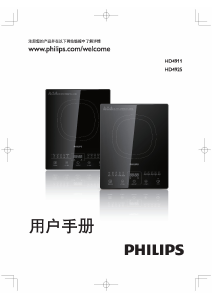
User manual
HD4911
www.philips.com/welcome
Important
information leaflet
HD4911
www.philips.com/welcome
Warranty
HD4911
c
a
b
d
e
f
g jh i k l m n o
t s
r q p

Loading…
常见问题
请给产品评分,告知您对飞利浦 HD4921 炉灶看法。您是否希望分享对该产品的体验或提出问题?请在页面底部留言。有关本说明书的更多信息
我们知道,为您的 飞利浦 HD4921 炉灶 提供纸质手册是件好事。 您随时可以从我们的网站下载该手册并自行打印。 如果您想要原始手册,我们建议您联系Philips。 他们也许能够提供原始手册。 您是否正在寻找其他语言版本的 飞利浦 HD4921 炉灶 手册? 在我们的主页上选择您的首选语言并搜索型号以查看我们是否有可用。
规格
| 品牌 | Philips |
| 模型 | HD4921 |
| 类别 | 炉灶 |
| 文件类型 | |
| 文件大小 | 1.25 MB |
关于 飞利浦 HD4921 炉灶 的常见问题
我们的支持团队将搜索有用的产品信息并回答常见问题。如果您在常见问题中发现不准确的回答,请使用联系表格告知我们。

加入有关该产品的对话
您可以在这里分享您对 飞利浦 HD4921 炉灶 的看法。 如果您有疑问,请先仔细阅读手册。 可以使用我们的联系表索取手册。